For most people, using PowerShell scripts/cmdlets to access Azure and get information
about subscriptions and resources (e.g. Logic Apps) will be enough.
But what if you want to do it yourself from .NET?
Luckily there are some good management libraries you can use. However, there
aren’t a huge amount of samples out there on how to use those management libraries.
So I thought I’d provide a guide on how to do the following: Log into Azure,
get a list of subscriptions, select a subscription, and then get a list of LogicApps
associated with that subscription.
The second part of this I covered in an earlier post on how to use the Logic
Apps Management SDK. But I soon discovered that the Azure Management Libraries and
the Logic Apps Management Library use a slightly different credential format.
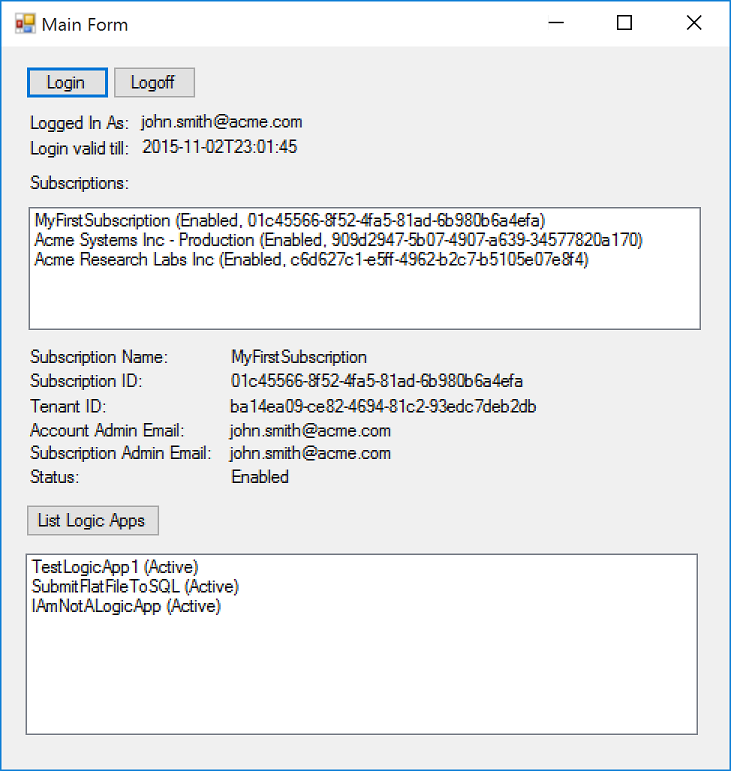
The Demo App
Here’s what the app we’re creating is going to look like:
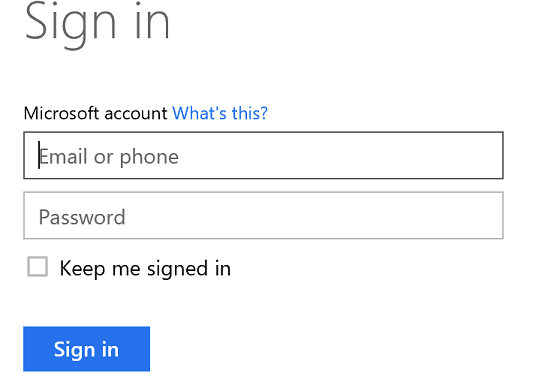
1) How to login
Normally when you login to Azure, you have to know what AAD Tenant to authenticate
against (see the sidebar below for an overview of AAD and tenants).
However, Azure has the concept of a multi-tenant login i.e. a login where you
don’t know which AAD Tenant you’re using: so you login using the common tenant.
When you login, you have to specify the ID of the client you’re using. Normally
in AAD you’d set up a client in your directory, and then authenticate against the
access rights given to that client.
This obviously wouldn’t work for a common tenant, so in the special case of
the common tenant, Azure has a list of common clients you can use. One of these is
the PowerShell client: when we use this client id, Azure assumes that we’re a PowerShell
script trying to authenticate against Azure (you can see this in the login window,
as it will say Sign in to Microsoft Azure PowerShell in
the window title).
Logging in using the common tenant gives us limited permissions, but one of
the things we *can* do is get a list of the subscriptions that the current user can
access.
Logging in is as simple as running this code:
|
string TokenAudience = “https://management.core.windows.net/” ; string ClientRedirectUri = “urn:ietf:wg:oauth:2.0:oob” ; string ClientId = “1950a258-227b-4e31-a9cf-717495945fc2” ; string EnableMagicCookie = “site_id=501358&display=popup” ; string BaseLoginUrl = “https://login.windows.net/{0}” ; string TenantId = “common” ;
AuthenticationResult result = null ;
AuthenticationContext authenticationContext
try { result = authenticationContext.AcquireToken( TokenAudience, ClientId, new Uri (ClientRedirectUri), PromptBehavior .RefreshSession, UserIdentifier .AnyUser, EnableMagicCookie);
} catch ( AdalException ) { result = null ; } return result; |
Some explanations:
What is returned to us is an AuthenticationResult object
that will have a JWT (aka Bearer Token) in the AccessToken property
(see the sidebar later for an explanation of JWTs/Bearer Tokens).
This AccessToken is what we pass to our
Management Library method calls, and later to our LogicApps SDK methods calls.
2) How to get a list of subscriptions
Luckily, with the Management Library, this is really easy:
|
CancellationToken canToken = new CancellationToken (); TokenCloudCredentials cred = new TokenCloudCredentials (commonTenantCredentials.AccessToken); SubscriptionClient client = CloudContext .Clients.CreateSubscriptionClient(cred);
SubscriptionListOperationResponse response
// Project subscriptions into a list of SubscriptionWrapper
List SubscriptionWrapper > ( sub => new SubscriptionWrapper (sub) ).ToList(); |
There are three main parts to the code above:
3) How to get a list of Logic Apps
Getting a list of LogicApps is simple too – all we need is our AccessToken ,
and the ID of a subscription.
We get the user to select a subscription from the list we obtained in the previous
step, and then execute this code:
|
using ( LogicManagementClient client new TokenCredentials (credentials.AccessToken))) { client.SubscriptionId = subscription.SubscriptionId;
Page Workflow >
List Workflow > } |
Here, we’re doing the following:
So far, so good.
But if you were to try and execute the above code using the common tenant AccessToken we
obtained in Step 1) you may find yourself getting this error:

The full error text is:
“The access token is from the wrong issuer ‘https://sts.windows.net/
/’. It must match the tenant ‘https://sts.windows.net/
/’ associated with this subscription. Please use the authority (URL) ‘https://login.windows.net/
‘ to get the token. Note, if the subscription is transferred to another tenant there
is no impact to the services, but information about new tenant could take time to
propagate (up to an hour). If you just transferred your subscription and see this
error message, please try back later.”
The reason for this is simple: we authenticated against the common tenant, but
now we’re trying access data from a subscription which belongs to a separate tenant
– and we don’t have an AccessToken for this
new tenant.
What we have to do in this case is acquire a new AccessToken (a
JWT) for the same user and client ID, but authorising against the tenant for the subscription
we selected.
i.e. we have an AccessToken , but it’s
a common tenant AccessToken , and therefore
is limited in what is authorised: to work with resources that are specific to a particular
subscription, we now need an AccessToken for
that specific subscription and tenant.
[Note: if we didn’t need to supply a list
of subscriptions, and new the subscription id and tenant id all along, we wouldn’t
even need to sign in using the common tenant].
To do this, we just need to run the code in Step 1) again, but this time instead
of using a TenantId of “common”, we use the TenantId of
the subscription the User selected.
Running the code from Step 1) again will cause the login box to appear again,
but in most cases it will flash up blank, and then disappear, as long as it detects
that your common tenant credentials are valid for the new tenant.
Note: You may notice that when you use the portal, and
you log in, and then change your subscription, you don’t see a login box: that’s because
there’s a way to refresh your current AccessToken for
the new tenant without going via the standard login route. I’ll cover this in a later
post.
4) How to logoff
Logging off should be really simple. But again, like most things in Azure when
you have multiple accounts, it’s not.
To log off for a given AccessToken (i.e.
a given login) you have to do the following:
The thing is, you can be logged into multiple tenants at the same time.
Personally, I think the logout functionality is a bit messy, although I suspect
it’s just that it needs to be surfaced properly in an API or REST call.
This is the code that needs to be executed. The AuthenticationObject needs
to be the one you created to login with (i.e. the one you put the TenantId into).
The code for clearing the Cookies comes from the source code for the UserTokenProvider in
GitHub ( https://github.com/Azure/azure-sdk-for-net/blob/master/src/Authentication/Common.Authentication/Authentication/UserTokenProvider.cs –
hat tip to Poul
K. Sørensen for finding it first!):
|
string LogoutUrlBase = “https://login.windows.net/{0}/oauth2/logout” ; authenticationContext.TokenCache.Clear(); new WebClient ().OpenRead( string .Format(LogoutUrlBase, “common” ));
NativeMethods .InternetSetOption( IntPtr .Zero, NativeMethods .INTERNET_OPTION_END_BROWSER_SESSION, IntPtr .Zero,
private static class NativeMethods {
internal const int INTERNET_OPTION_END_BROWSER_SESSION
[ DllImport ( “wininet.dll” , internal static extern bool InternetSetOption( IntPtr hInternet, int dwOption, IntPtr lpBuffer, int lpdwBufferLength); } |
And that’s it.
Well, there’s a bit more: you should cache the AuthenticationObjects and AccessTokens for
each Tenant you login to so you don’t login more than once.
Here’s a link to the sample code – it’s a VS2015 project. It’s not production
quality code (hey, it’s a WinForm app! How retro!) but it does the job and gives you
an idea of how to do this yourself. Also, to keep the size down, I didn’t include
the NuGet packages, so when you first open it it will attempt to download them all
(or go to Tools/NuGet Packaage Manager/Manage NuGet Packages for Solution to download
them) – it won’t compile without them:
DemoGetSubscriptionsAndLogicApps
v1.0.zip (18.29 KB)
Any problems, let me know – I can’t guarantee it’ll work for all scenarios.
|
Sidebar
Here’s some useful information that should help you understand how
What “logging into Azure” means
When you log into Azure, you’re logging into Azure Active Directory
Technically, you’re using an AAD Tenant: A tenant is an instance
When you create a personal Azure Subscription, an AAD tenant is created
The default directory will use a name related to your Microsoft Account
You can create multiple AAD Directories from within the management
A subscription can only use one directory at a time – you can see
Note : if you have an Enterprise O365
Because we’re using the management libraries, we’re using the OAuth
A JWT (JSON Web Token – see here for
When we authenticate (using the Azure login window) we’re passed
Note that if you were using the REST interface (which is what the
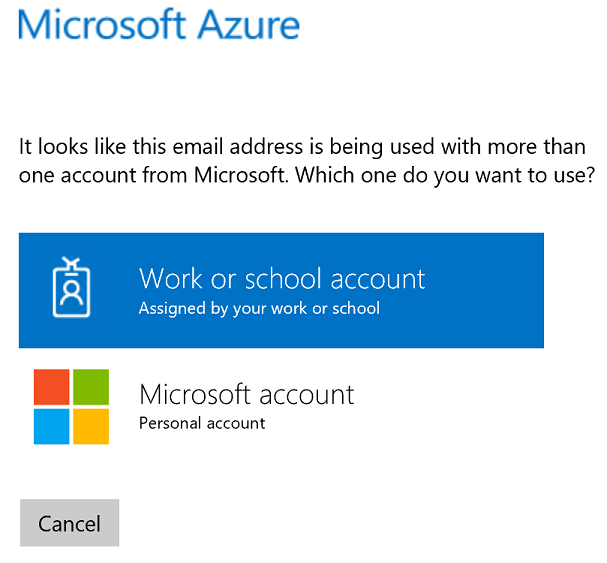
Two types of Azure Account There are currently two types of Azure account:
Why is this important? Azure needs to know what type of account you
When you attempt to login to an Azure resource e.g. the management
(it used to have a password box under it, and when you tabbed out
The reason this screen exists is to allow Azure to work out if you
If you happen to have an Org Account and
This is Azure’s way of saying that it can’t work out which of the
Some services only allow you to use a Microsoft
The bane of those with multiple accounts: Auto Logon
One thing that those people with multiple Azure accounts (both Microsoft
Why does this happen? It’s to do with how Azure AD has grown over
Firstly, there’s the “Keep me signed in” feature: if you see this
Next time you go access a secured resource or click the SignIn button,
But… if you then login using another account, and *don’t* tick the
It gets more complex when you realise that whilst only a single Microsoft
I mention this because when it comes to logging in from code, you
How to login to Azure if you don’t know the tenant
With all the discussion above, it may not be obvious on how to login
The solution is that Azure provides for the concept of a common tenant:
Prompt Behavior
In Step 1, where we login, note the use of a variable called promptBehavior :
This value is an enum called PromptBehavior ,
In our case, we want to use RefreshSession when |