One of the questions I saw on Twitter after yesterday’s Azure App Service launch was:
how do you do an if-then-else in a Logic App? Or even a For loop?
If you’re coming from a BizTalk Orchestration or Windows Workflow background, you
may be surprised by the lack of shapes in a Logic App for performing these operations.
However, you can still do all those things: you just need to look at the problem differently.
Background
A Logic App is just a JSON file that contains a list of Triggers (apps that can start
the flow) and Actions (apps that are executed as part of the flow).
You can see the JSON file by clicking the Code View button (at the top of the screen
whilst you’re editing a logic app – you’ll need to have saved your logic app first).
[In another post I’ll go through the format of this JSON file – you can actually author
Logic Apps in Notepad, and then upload them to Azure, or paste them into the designer.]
API Apps are just a web site hosted on an IIS server (there’s bit more to it than
that, but we won’t go into that today). They have an exposed REST API (hence the name
API Apps) and you interact with the using standard HTTP verbs e.g. POST, GET, PUT,
and DELETE.
Therefore, for a logic app to make use of an API App, it needs to know the endpoint
for the API App. You can see this if you look at the JSON code for your logic app.
Take the example where you’ve added a BizTalk File Connector as the trigger for your
Logic App. The File Connector will poll for the presence of a file on a remote (on-prem
usually) server.
The config for this in the JSON file looks like this:
“triggers”: {
“fileconnector”: {
“recurrence”: {
“frequency”: “Hour”,
“interval”: 1
},
“type”: “ApiApp”,
“inputs”: {
“apiVersion”: “2015-01-14”,
“host”: {
“id”: “/subscriptions/(sub id)/resourcegroups/(resourcegroup name)/providers/Microsoft.AppService/apiapps/fileconnector”,
“gateway”: “https://(gatewayid).azurewebsites.net”
},
“operation”: “TriggerOnFileAvailable”,
“parameters”: {
“triggerState”: “@coalesce(triggers()?.outputs?.body?[‘triggerState’], ”)”,
“FolderPath”: “hello”,
“FileMask”: “*”,
“FileType”: “Text”
},
If you look at the above, you can see the URI to the FileConnector API App in the
inputs section, under host then id.
It’s this JSON file that will store the execute conditions and repeat conditions that
we use to control conditional statements and looping.
How to do conditional statements
By default, all actions in a logic app run in parallel: the logic app needs to be
triggered in some way (either by being called directly, or via a trigger API App),
but once running, the logic app will run all contained API Apps in parallel. Unless
you tell it not to.
Those of you who watched Josh Twist and Scott Hanselman’s video
on creating Logic Apps may have noted that Scott pointed out that you chain API
Apps in a Logic Flow together like in a pipeline and have data stream between them
– and this is the crucial point: Each API App can have a set of conditions that indicate
when it should execute. The API App is only executed (called) when these conditions
evaluate to true.
These conditions are used for 2 purposes:
Now, to most BizTalk and Workflow developers, this may seem like an odd way to do
it – unlike an Orchestration or Workflow, you can’t look at a flow and see immediately
what the conditions are. But this will come over time (fingers crossed – this is just
a public preview remember – Microsoft want all the feedback they can get). In the
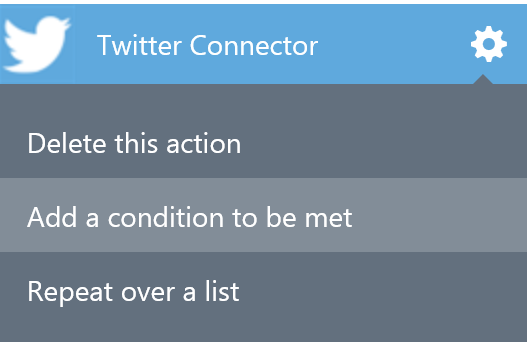
meantime, to set conditions:
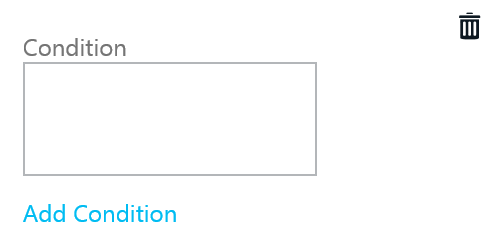
You can add multiple conditions by clicking the “Add Condition” button again and again,
or delete the condition by clicking on the trashcan to the right of the condition
text box.
You should notice the elephant in the room at this point: what the ^$%* is a “logic
app formula”???. Well, that’ll be the subject of another blog post as it’s a biiiiiig
subject. There’s a whole formula language that is used throughout logic apps, including
expressions, functions, conditions, etc.
An example of a condition formula would be:
@or(equals(actions(‘apiapp1’).status, ‘Succeeded’),greater(actions(‘apiapp2’).outputs.value,0))
The above condition says: If the API App called “apiapp1” has a status of TRUE OR
the value output of the API App called “apiapp2” has a value greater than 0, then
continue.
And this applies to if-then-else statements as well: to do an if-then-else you need
to have one condition for the if part (e.g. if output value = 10); and one opposing
condition for the else part (e.g. if output value != 10). Once you’ve been doing it
for a while it starts to make more sense. The difficult part is that the conditions
are now part of the API app definition, which is the biggest change to get your head
around.
Once I get on to talking about formulas, I’ll give some more examples of conditional
statements.
Looping
Looping is handled in a similar way to conditional statements: rather than there being
a looping shape or app, you simply tell your API App that it should loop over the
output from a previous API App or Trigger.
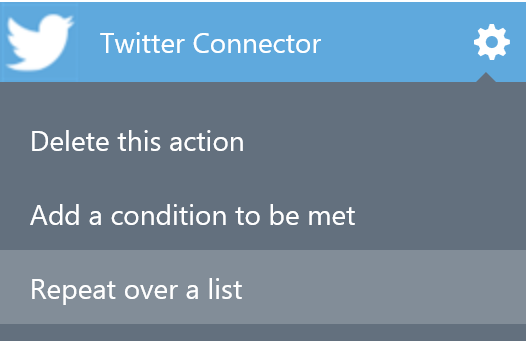
You do this from the same place as for setting conditions: click the gear icon at
the top right of an API App in your logic app, and select “Repeat over a list”:
You then get a text box, where you can type in the repeat formula – but luckily, you
also get a button that allows you to select the output from a previous API App or
Trigger as long as that API App or Trigger returns a list as defined by its API.
This explains why sometimes you may not see any options when you click the button:

If you want to remove the repeat operation, click the gear icon and select “Do not
repeat over a list”.
Under the covers, setting a repeat formula generates something like this in the Logic
App JSON:
repeat : “@action(‘apiapp1’).outputs.messages”
And that’s how you do looping in Logic Apps.
I appreciate I’ve given a quick runthrough on what is quite a complex subject – I’ll
be covering this more in forthcoming blog posts where I’ll give some samples, and
also give some more detail on the Logic App formula language.